Preparing the body
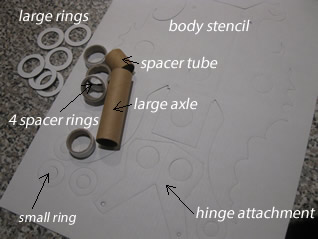
Step 1 Obtain the stencil of the body . Press out the small rings, the hinge attachment and body.
Step 2 Place glue on the tail end of the body and fold upwards so the two large holes overlap.
Step 3 Place the spacer tube through the overlapping holes and press down until it is flush with the surface of the body, before gluing into position.
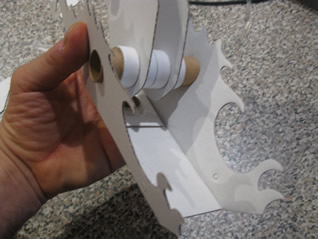
Step 4 Now insert the arm onto the body using the four spacer rings, as shown on the right. Place two large rings on either side of the large axle. Make sure the jaws of Hydraulicus point away from the tail.
Click to see the body with arm.
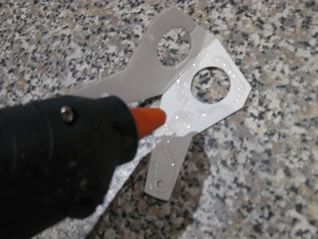
Step 5 Locate the hinge attachment and place glue on the surface as shown.
Step 6 Fold the hinge attachment so that the two holes overlap.
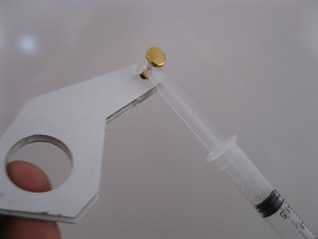
Step 7 Secure the syringe with the split-pin to the hinge attachment, as shown on the right.
Step 8 Slide 3 large rings over the spacer tube on the under side of the body.
Step 9 Place a thin layer of glue to secure the last ring to the spacer tube before sliding the hinge attachment over the spacer ring so that it touches the last ring. The hinge attachment should be glued to the body with the split pin facing upwards.
Click To see what the assembly looks like.